
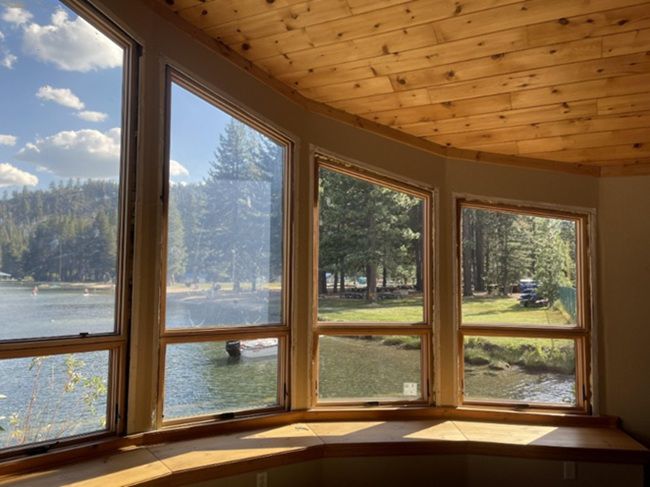
A phased plan for replacement windows Roseville, CA works best when you make whole-home decisions first, then install in the rooms that have the most urgent functional or comfort problems. Replacing windows in random order can leave you with mismatched sightlines, inconsistent operation styles, and a second phase that becomes harder to coordinate than it needed to be.
A room-by-room project can reduce disruption and spread installation over time. The key is treating every phase as part of one connected exterior system, not as a separate purchase.
Key Takeaways
- Start by documenting every window, even those that are not part of the first phase.
- Prioritize failed operation, water exposure, drafts, and heavily used rooms over cosmetic concerns alone.
- Record product and trim decisions early so future windows match the first installation.
- Group later phases by exterior elevation, room function, and access needs.
- Revisit the plan before each phase, especially after weather or home-use changes reveal new priorities.
Start with a Whole-Home Window Inventory Before Choosing the First Room
The first phase should not be chosen until you know what is happening across the house. A window that looks acceptable from indoors may have exterior trim deterioration, difficult access, or an outdated profile that affects how future replacements need to be specified.
1. Walk Every Room and Exterior Elevation
Create a simple list of every window by room and exterior wall. Note its size, operating style, whether it opens and locks properly, and what it serves. A bedroom egress window, for example, has a different role than a fixed window in a stairwell or a small window over a kitchen counter.
From outside, note which windows share the same elevation, trim treatment, frame color, grille pattern, and visual alignment. This matters because front-facing windows often need to be planned together, even when the interior rooms are replaced at different times.
2. Record Conditions That Change Priority
Look beyond fogged glass or worn screens. Document hard-to-operate sashes, noticeable air movement, stained interior finishes near openings, soft exterior trim, and windows exposed to repeated weather.
If an opening shows signs that water is getting past the outer layers, waiting can allow surrounding materials to deteriorate further. A replacement window installation needs a sound opening and proper integration with the surrounding wall. Delaying a vulnerable opening may turn a focused window project into a broader exterior correction later.
3. Photograph Details That Must Match Later
Take clear photos from indoors and outdoors. Include frame profiles, interior casing, exterior trim, grille layouts, and groups of windows that line up across a wall.
Those images become useful when later phases are planned months or years afterward. They also help you think through how to keep replacement windows visually consistent with your home’s original look, rather than discovering too late that a new frame profile changes the appearance of a prominent elevation.
Set the Rules That Will Guide Every Phase
Before choosing products, decide what will control the sequence. Most homeowners need to balance daily comfort, safety of the opening, disruption, and exterior appearance. Write those priorities down so decisions do not shift based only on whichever room is most annoying that week.
A practical set of rules might include addressing windows that do not operate correctly first, protecting rooms with repeated moisture exposure, and keeping all street-facing windows visually coordinated. You may also decide that bedrooms are scheduled during a quieter period of the household calendar, while less-used rooms can wait.
The best plan is not always the one that starts with the most visible windows. Visible condition matters, but a poorly functioning window in a regularly used bedroom or a weather-exposed wall can deserve priority over a cosmetic mismatch in a seldom-used room.
If you need help turning an inventory into a usable sequence, arrange an in-home assessment with California Craftsman and bring your room list, photos, and priorities to the discussion.
Choose a First Phase That Solves a Real Problem
A first phase should give the household a clear benefit while establishing the standards for later work. It often includes a small group of related windows rather than one isolated opening.
1. Rank Windows by Daily Impact
Start with windows that affect how the home functions every day. Common strong candidates include:
- Frequently used bedrooms: Windows that are difficult to open, close, or lock should not be put off simply because they are less visible from the street.
- Living areas with recurring discomfort: A room that remains noticeably hot, cold, or drafty despite normal heating and cooling is worth evaluating early.
- Openings with exterior exposure concerns: Windows near weathered trim, staining, or recurring moisture should move ahead in the plan.
- Groups on one exterior wall: Replacing a related set can protect the home’s appearance and reduce repeated disruption on that side of the house.
2. Consider How the Work Affects Your Household
The best technical priority may not be the right first phase if it conflicts with a major home event, a new baby, remote work demands, or a period when access to a room is limited. Installation is temporary, but rooms need to be cleared, window coverings may need to come down, and exterior access must remain open.
A good compromise is starting with a guest room, unused office, or one side of the home when that phase also solves a real performance issue. Avoid using household timing as the only deciding factor, though. A vulnerable opening should not be pushed indefinitely just because another room is easier to empty.
3. Avoid Starting with an Isolated “Easy” Window
One easy window may seem like a low-disruption start, but it can create design problems. If it is part of a visible bank of windows, a different frame width, color, glass appearance, or grille layout can stand out once adjacent windows are replaced later.
Use the first phase to confirm the full design direction. That includes what the windows look like from the curb, how they operate inside, and how interior trim transitions to the new frame.
Map the Remaining Rooms Into a Logical Replacement Sequence
After the first phase is selected, map the rest of the home around practical installation groups.
- By exterior elevation: Plan front, side, or rear groups together when matching appearance is important. This is especially useful for windows that line up across the façade.
- By floor level: Upper-floor openings may require different exterior access than ground-level windows. Grouping them can simplify planning and reduce repeated setup.
- By window style: Similar sliding, casement, fixed, or hung window groups are easier to keep consistent when decisions are made as a set.
- By household use: Bedrooms, offices, and kitchens each create different disruption concerns. Schedule high-use spaces around times when the room can be temporarily cleared.
- By related exterior work: If siding, trim, or wall conditions around certain windows need attention, those openings may need to be handled in a coordinated phase rather than separated.
A typical sequence might start with a failing bedroom group, move to the adjacent elevation where the exterior details must match, then finish the lower-priority rooms. The exact order depends on your inventory, not a standard template.
Keep Product and Design Decisions Consistent Across Phases
The first order establishes more than the first room. Before installation begins, create a project record with the decisions future phases must follow.
Include the operating style for each opening, frame material and color, glass package, grille pattern, screen type, interior casing approach, exterior trim profile, and hardware finish where applicable. Keep copies of product specifications, photos, and final measurements with the room inventory.
This record is especially important if a manufacturer changes an option later or if a product line is updated. Exact matches are not always available indefinitely, so planning prominent window groups earlier can prevent visible differences across the same wall.
Do not rely on memory. A note such as “white windows” is not enough when one white frame has a different sheen, profile, or visible glass area than another.
Prepare Each Room and Review the Plan Before Moving Forward
Each phase should be treated as a short, organized project. Preparation protects furnishings, helps the installation move efficiently, and reduces surprises when openings are exposed.
1. Prepare the Interior and Exterior Work Areas
Move furniture, electronics, fragile items, and window coverings away from the work zone. Make sure installers have a clear path from the entry to each room, and identify exterior obstacles such as planters, patio furniture, or landscaping near the openings.
Ask in advance how interior surfaces and floors will be protected and what access the crew will need. If an opening is behind a large built-in or difficult-to-move furnishing, discuss it before scheduling rather than on installation day.
2. Schedule Around Real Household Needs
Plan for noise, limited access to active rooms, and temporary changes to privacy. If someone works from home or a child naps in a particular room, schedule that room when the household can use another area.
Window coverings also deserve attention. Measure and save them if they will be reused, but do not assume every covering will fit a new frame the same way. The visible glass area and mounting depth can change.
3. Recheck the Plan Between Phases
Review the project after each completed group. Confirm that the selected styles, trim details, and operation choices still meet your expectations before ordering the next rooms.
Revisit priorities when conditions change. A window that seemed lower priority may move up after a storm, a shift in room use, or new evidence of moisture around the opening. Updating the sequence is sensible, but changing product decisions casually can weaken the cohesive result you were building.
Frequently Asked Questions
Which Rooms Should Be Replaced First?
Start with rooms containing windows that are hard to operate, exposed to recurring moisture, or causing daily comfort problems. Bedrooms and main living areas often rank high because the windows affect regular use, but exterior conditions can override room use when an opening appears vulnerable.
Should I Prioritize Exterior Appearance or Window Condition?
Both matter, but condition should generally lead when an opening has operational or weather-related concerns. Exterior appearance becomes especially important when several windows share a visible wall, because replacing one without planning the group can create a mismatched result.
How Do I Keep Future Window Phases From Looking Different?
Document every decision from the first phase, including frame profile, color, glass, grille pattern, trim, and operating style. Keep product paperwork and photographs, then review them before each later order. Plan highly visible window groups earlier when possible.
Can I Replace Windows One Room at a Time?
Yes, provided the rooms are part of a whole-home plan. A phased project works well when you know how each room relates to neighboring windows, exterior elevations, and future design choices.
When Should I Update the Replacement Sequence?
Review it after every completed phase and before the next one is ordered. Changes in window condition, household routines, exterior exposure, or product availability may justify moving a room forward in the schedule.
A room-by-room plan for replacement windows Roseville, CA should leave you with a home that looks intentional and performs better at every stage, not a collection of unrelated upgrades. California Craftsman can help you evaluate the whole house, establish a logical first phase, and plan the next steps. Call (530) 582-1822 to start with an organized window assessment.